Edit 4/30/2019: It has been reported that this process may now only work for pages with 2,000+ likes.
Recently we have discovered an even further value for DonorSnap Forms – Facebook Page Tabs. Creating a new Facebook page tab out of a DonorSnap Form is easy enough that any user can implement it. Whether you feel your organization could benefit from a “Donate Now” Facebook tab, a “Join our Mailing List” tab, an “Event Sign Up” tab, or more, follow the step by step guide below. In a matter of minutes, your Facebook page will have an integration with your DonorSnap database.

Step One: Create your form
If you aren’t already using DonorSnap for your donor management, you’ll need to sign up for an account first. After you’re signed up, you’ll be ready to create any number of forms that you need. For more help on creating your forms, watch the online forms tutorial video here.
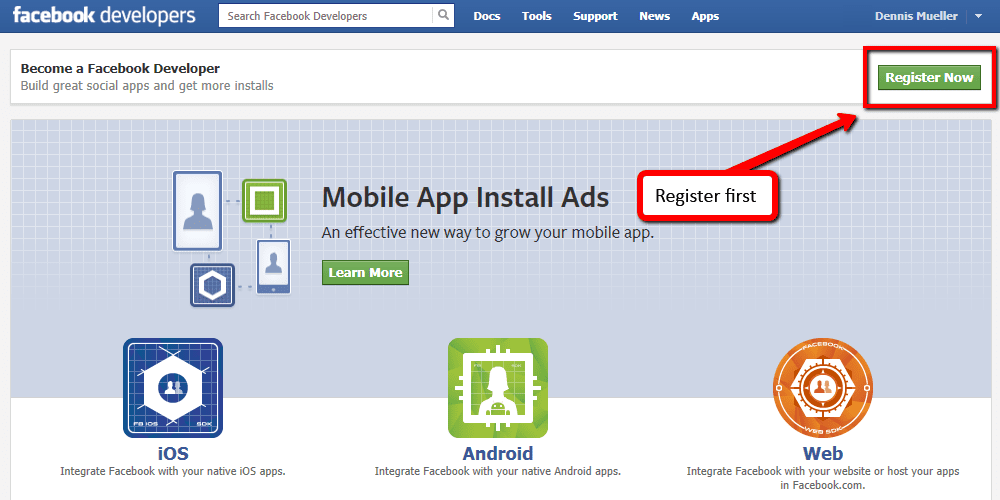
Step Two: Sign up to be a “Facebook Developer”
In order to create your own Facebook Page Tab App, you’ll need to be granted access to the developer area. Don’t worry if this sounds scary. Just keep following the directions and you’ll find it foolproof. You can also brag to your friends that you have developed a Facebook app for your organization.
To sign up, go to https://developers.facebook.com and click the button in the top right corner as shown below. Follow the prompts and verify your account.
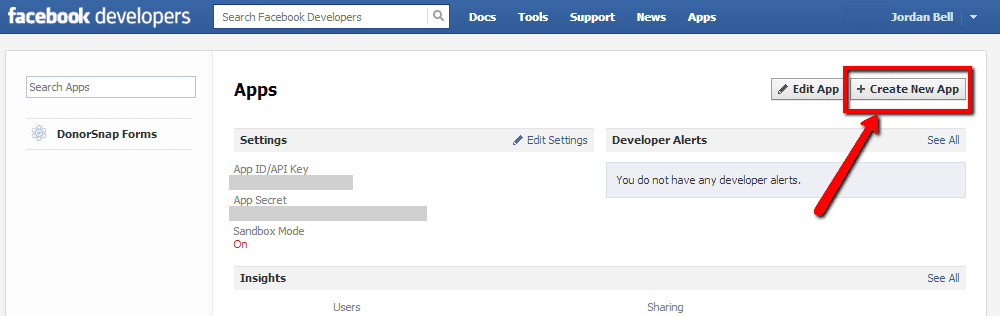
Step Three: Create Your Facebook Tab App
After you are verified, you’ll need to go to https://developers.facebook.com/apps to start creating your tab app. Click the “+ Create New App” button at the top of the screen and continue through the prompts confirming that you accept the guidelines and that you are human.
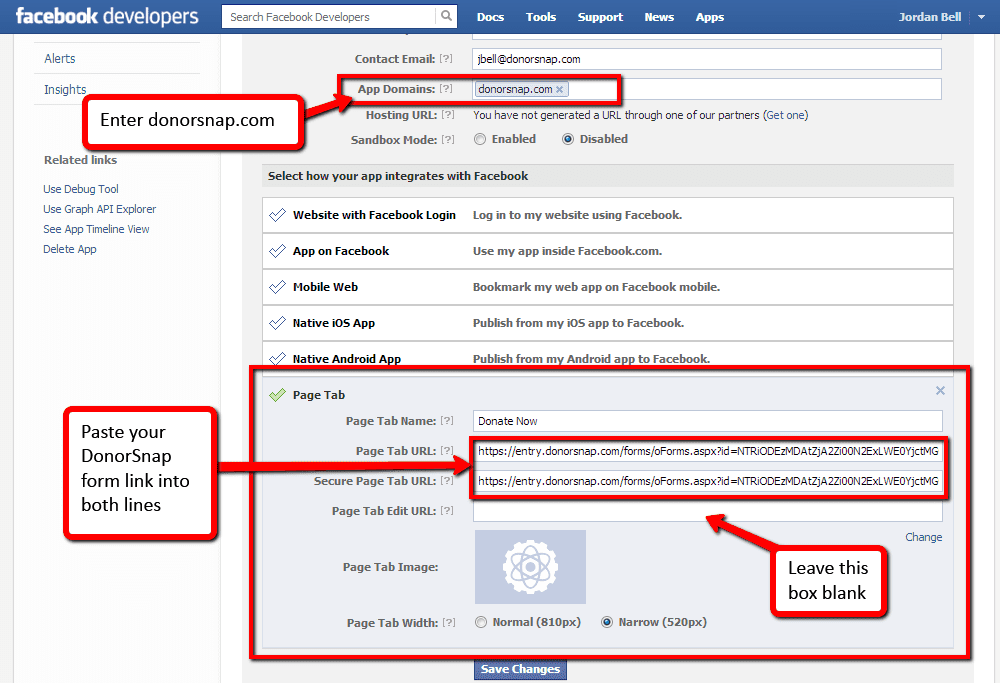
Next you’ll see the app creation form and your App ID on top. Make sure to note this number, because you’ll need it in the next step. Click the Page Tab check mark and fill out the form with your information. Make sure to fill out the following fields as directed:
- App Domains: “donorsnap.com”
- Sandbox Mode: Disabled (if you enable it, your tab will only be visible to administrators)
- Page Tab Name: This can be whatever you would like your tab to be labeled on your Facebook page.
- Page Tab URL: Paste your DonorSnap form link for the specific form that you would like to use.
- Secure Page Tab URL: Use the same thing as the Page Tab URL
- Page Tab Edit URL: Leave blank
Step Four: Install the Facebook Page Tab App
Now that your Facebook Page Tab app is created, you’ll need to install it on your page. To install it, you’ll need to enter the following address into your browser, but make sure to replace “Your_App_ID” with the number that you wrote down in the step before.
https://www.facebook.com/dialog/pagetab?app_id=YOUR_APP_ID&next=https://www.facebook.com
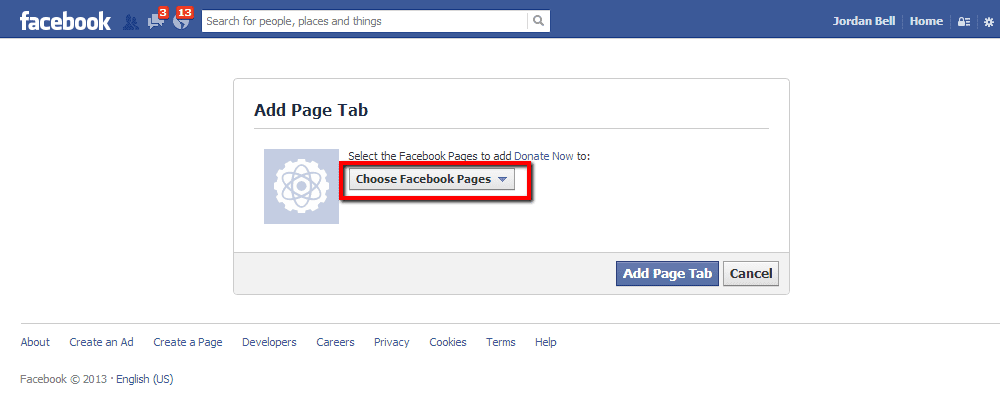
If you entered the URL correctly, you should be presented with the following page. Select your organization’s Facebook page and click Add Page Tab.
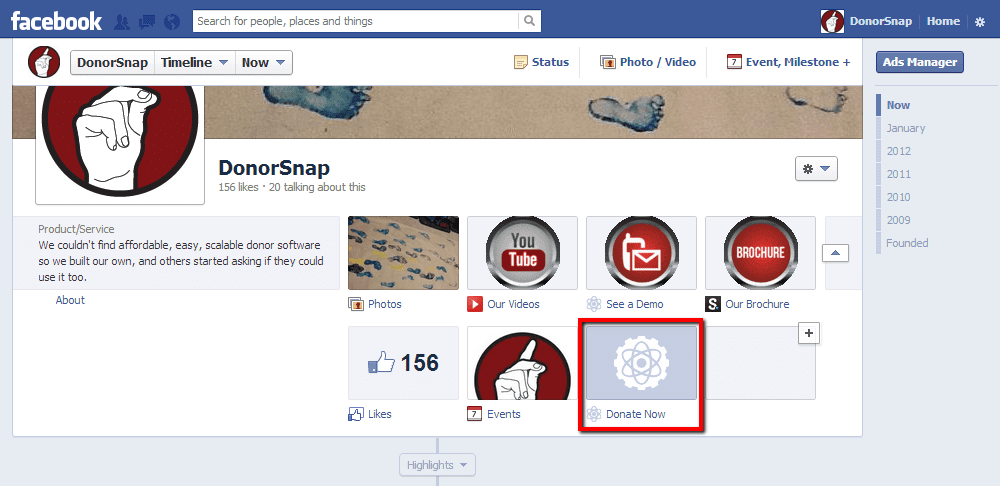
Step Five: Your new Donate Now form is now a tab on your Facebook Page
That’s it. Now go to your Facebook page and see your new tab available to collect donations or whatever else it was designed for.
For more information, please refer to the Facebook Page Tab App tutorial. When you finish, let know how you’re using your form on your Facebook page by commenting below.
Not using DonorSnap yet?
Sign up for one of our free webinar demonstrations to see the software in action.
Ready to be set up with your own database? Sign up for your new account now!