
Responsive Forms – 2 – Settings Tab
Online Forms > Responsive Forms > Settings tab
Video Outline
- Adjust all of the settings for your form
- Add a header, logo, and other page setup
- Explanation of sign in/registration form
- Confirmation Web Page
- Confirmation Email and send a copy of all emails to a BCC email address
- Customize the submit button
- Set the default formatting for all fields, new sections, new headings, and new textboxes
The Settings Tab
The Settings Tab is where you affect all the background information about your form (colors, your top image, the confirmation page & email, etc.) Use the menu on the left to navigate through all the settings.
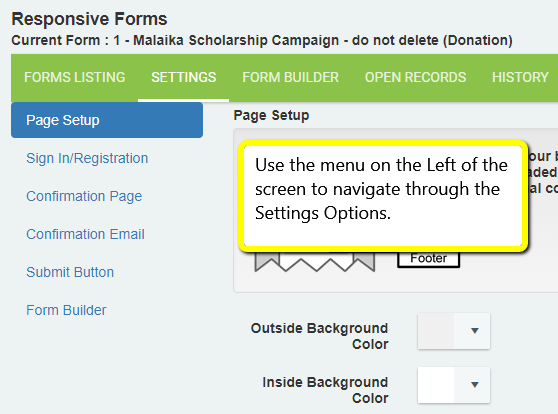
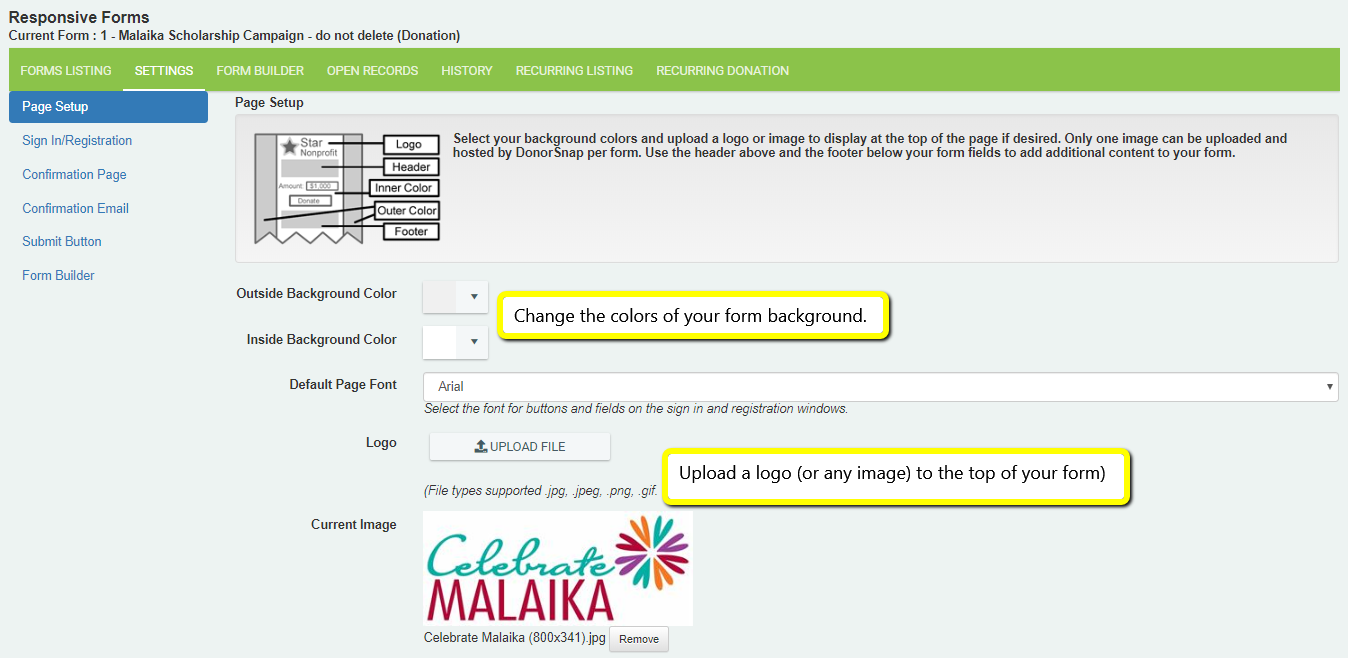
Page Setup
The Page Setup category is where you change colors, add header/footer content, and upload your logo or any image at the top of the form. Responsive Forms only hosts one image for each form. (To add multiple images, you must host them somewhere else on the internet.)
One of the requirements for every organization collecting payments is to include a Privacy Policy. This policy does not need to be on the form itself if you already have it on a separate page of your website. By default, we have included a boilerplate privacy and refund policy that shows up at the bottom of your form to help satisfy this requirement. Customize this text as needed.

Registration
Registration allows visitors to your website to create an email/password for your forms. When a returning user signs in, the contact tab fields on your form will automatically populate with the data from your database. This means that the user will not have to fill in their name, email, address, etc. They will only need to fill out the donation, interaction, or volunteer hours information. Credit card data is never saved in DonorSnap and will need to be entered each time they return.
Including registration is helpful in two ways:
1) for forms where a visitor might complete often, such as Volunteer Hours, they only need to login with their email/password and then they don’t have to fill out all their personal information again. Less work for them!
2) on your DonorSnap Admin side, once a form is submitted the first time, you will connect it with the correct Contact inside DonorSnap. But the second time they submit a form, the submission is automatically connected to the correct Contact. Less work for you!
Consider including Registration for repeated-entry forms, such as Volunteer Hours, or for forms that your regular committed constituents use. In general, you would not include registration for donation forms. Keep your donation forms short and sweet so that you don’t scare new visitors with having to “register” just to make a donation.
Customize the Registration Form
If you add registration to your form, would you like to force them to sign in with an email address and password, or would you like them to be able to bypass signing in and enter as a “Guest”?
You can customize the text associated with the registration page so it makes more sense to your web visitors.
You can also customize the look and feel of the buttons on the Registration page.

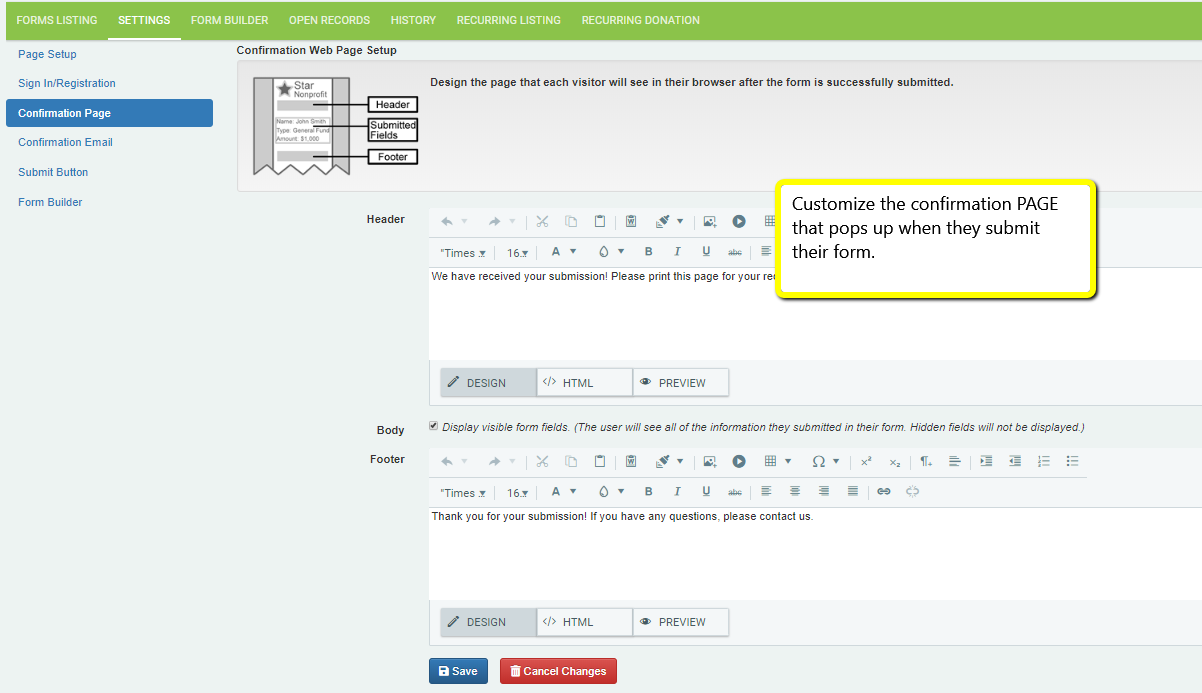
Confirmation Page
When a form is submitted, their browser window will immediately pop up a Confirmation Page.
Customize this page with any message you would like to display for their form submission.
This is a great time to insert links back to your website for more information, let them know that they will also receive an email receipt, invite them to share the form with others, etc.
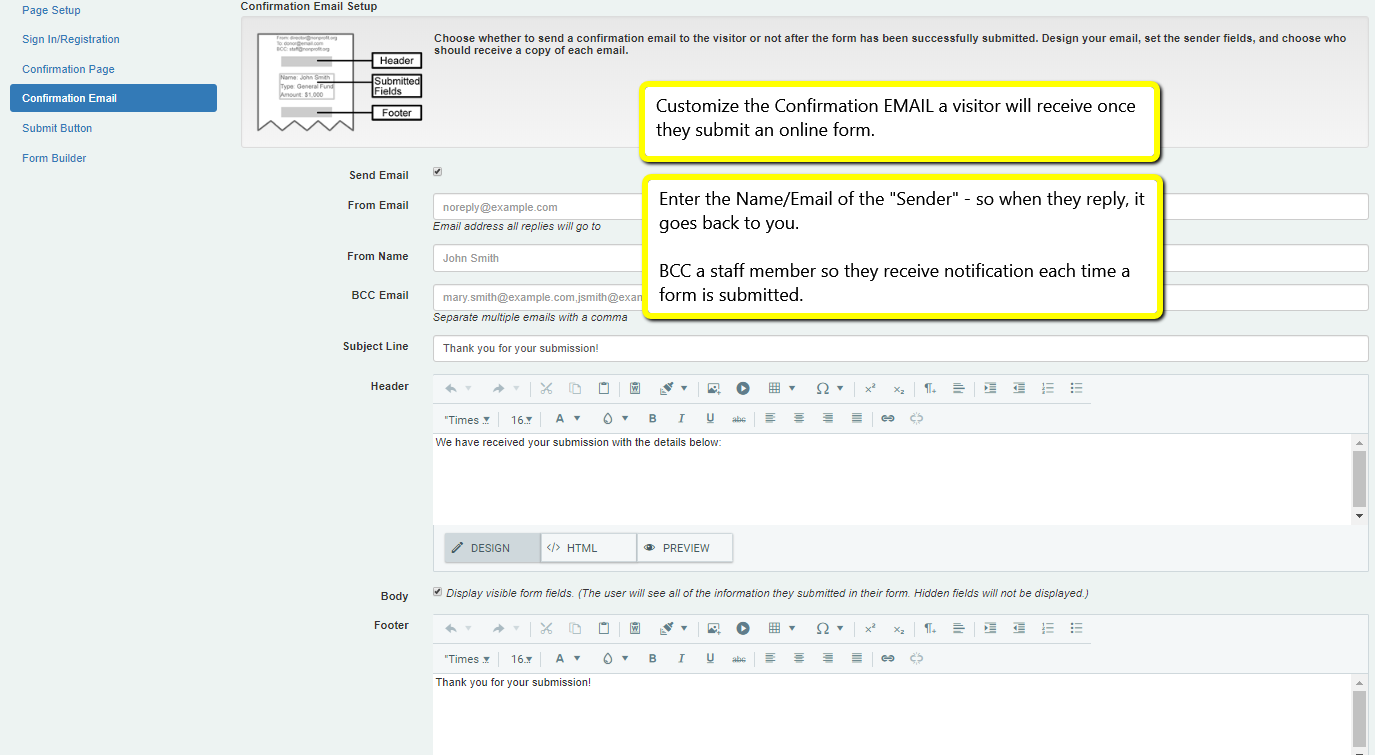
Confirmation Email
All form submissions by default will send a confirmation email immediately. This is where you customize that email, or choose to turn off the sending of those emails.
NOTE: If a visitor does not enter their email address on the form, then no confirmation email will be sent, and you will not receive a copy of the email via BCC. If you need to receive a BCC email for every submission, then you must require the visitor to supply an email address.
Enter the name/email of the Sender. Include a BCC email if needed. If you would like to send a copy of the email to multiple people, separate the email addresses with a comma in the BCC field.
Choose whether or not to include the fields they completed on the form.
This is a great time to send them additional information about the form they submitted. For example, if it’s a registration for the Golf Tournament, give them instructions of what to bring, directions to the event, etc. If for volunteers, let them know you’ll be following up soon about their background check, etc. Skies the limit – but here’s your chance to tell them all they need to know!
Click here for help on inserting images into your email.
Submit Button
The Submit Button option is just as it sounds, what do you want your button to say? And what color do you want it to be?
Best practices show that you should be descriptive in your submit buttons. If you’re collecting donations on the form, “Donate Now” would be a great choice. If you’re accepting event registrations, consider “Register for the Event.”

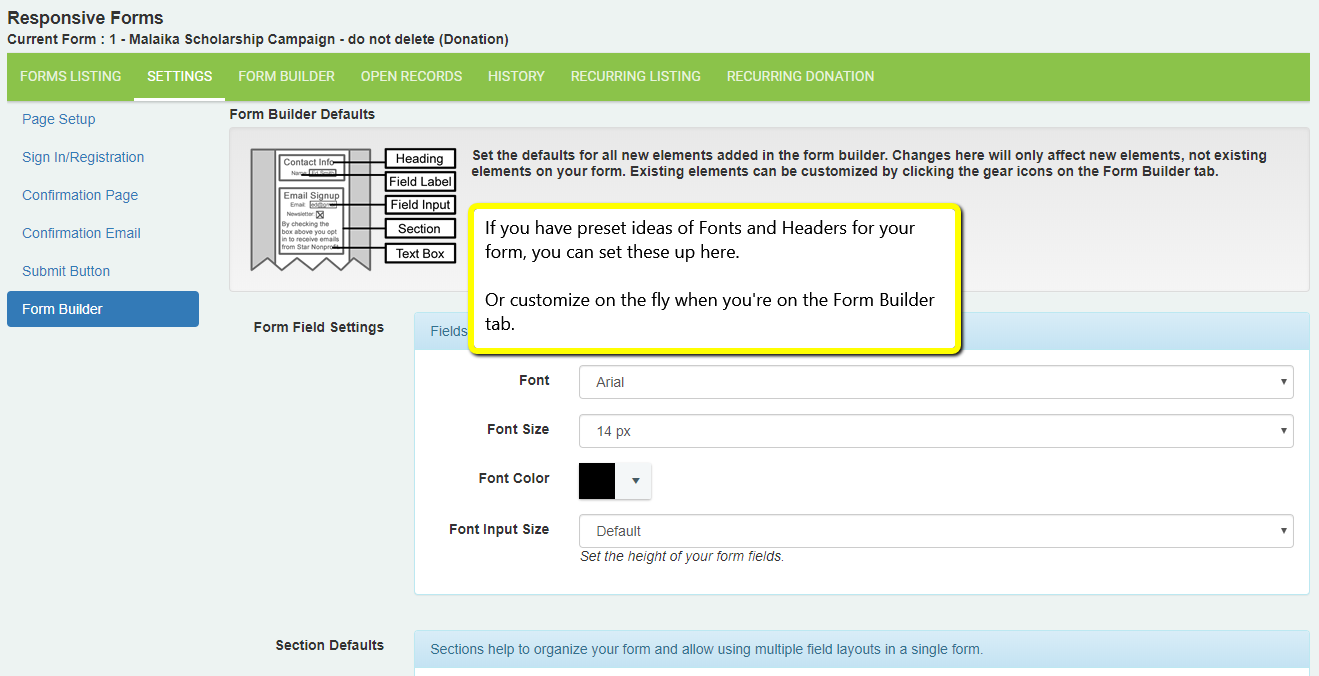
Form Builder
When you are building the content in the Form Builder tab itself, you can add headings and text boxes. The formatting for each of these items are customized individually on the Form Builder tab. And honestly, that’s when most of us select the formatting for these components.
However if you plan ahead, this section is designed so that you only need to choose the formatting of your headings and text boxes once. If you select your formatting here, you don’t have to make the same changes for each component after you create them in the Form Builder tab. Choose your fonts, sizes, colors, etc. that you want for your form. Of course all that you create here can also be edited and modified individual once you’re on the Form Builder tab of the actual form (so they don’t have to be set in stone).
When you change the settings here, it will only affect new headings and text boxes that you add going forward.
Next Steps:
- Forms Listing
- Settings – You are here
- Form Builder
- Open Records
- History
- Recurring Listing
- Recurring Donation