
Responsive Forms – 3 – Form Builder Tab
Online Forms > Responsive Forms > Form Builder tab
Video Outline
- Add fields to your form
- Make a field required on your form
- Change the text displayed on your form
- Rearrange the fields on your form
- Adjust the formatting of a specific section
- Add additional sections to a form
Form Builder
Building your form… this where is it all happens!
You have all the creativity available here between different sections, Headers, Text boxes, what fields you want to include and how you want those fields to be shown.

**Please remember that DonorSnap’s forms update the database.
Which means, there has to be That field in the database BEFORE you can put it on the form; a person cannot fill out their Dinner choice, unless you have build a “Dinner Choice” field in your database first.
Before building a form, we recommend looking at how your database is already set up. How would you add the information to the database manually, as if someone were standing in front of you — to help you get an idea of what fields you need on your online form.
Required Fields
In today’s world, we need their address. Period. Make that field required!
You can make numerous fields required, Address, Cell, Check this box to Agree, Volunteer Interests, whatever fields on your form that you MUST have completed, make them required.
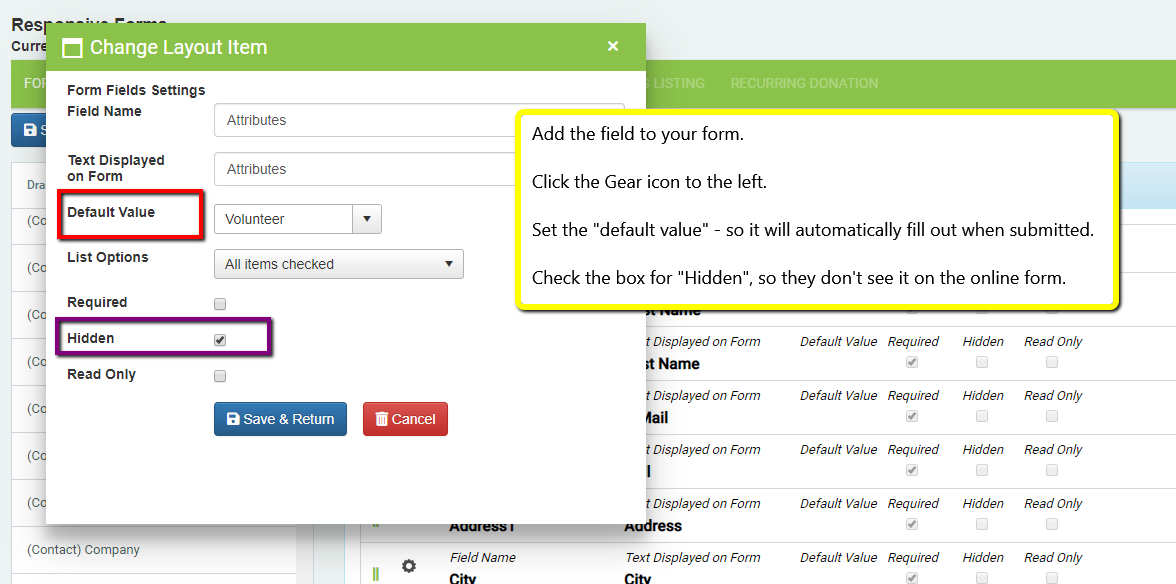
Simply click the Gear icon to the left of the field and check the box for Required. Save that and Done!
Hidden Fields
We will say this over and over again, but please remember that DonorSnap forms are a little different than others because they update the DonorSnap DATABASE. They don’t just email you the information, they complete the Contact record of your database; they complete the Donation record of the database.
This means you are capturing information on this form that you will want to report on later, so it Has to be part of the form — but the visitors to your website don’t need to know your stuffs.
Consider this:
A Volunteer Registration form.
You want every person completing this form to be called a “Volunteer” in your database, so they get on that volunteer list.
Where do you track that Volunteer information? Probably the Attributes field. So in your form, you need to include that Attributes field, call every one a Volunteer, and HIDE that field from the form… so it happens in DonorSnap, but they, outside in the world, don’t need to know that you’re labeling them with an attribute.
Consider more with Donations (specifically Event Registrations)…
The form is for the Golf Tournament
All are “Event Tickets”
All are going to some place in QuickBooks.
What about the DATE of their payment?
All of this is extremely important for DonorSnap’s purposes, so you can report on it later, but those on the website filling out the form, don’t need to know all that back end stuffs you’re doing.
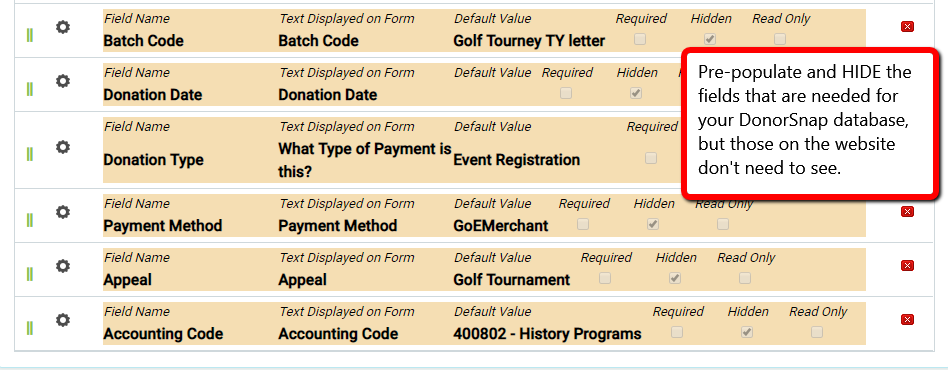
Pre-populate fields that you need & hide them.
Keep the Date Field BLANK, so it automatically submits Today’s Date, and hide it.
Consider all the fields you would enter manually (Batch Code = what Thank you letter will they receive?), set the default, hide it.
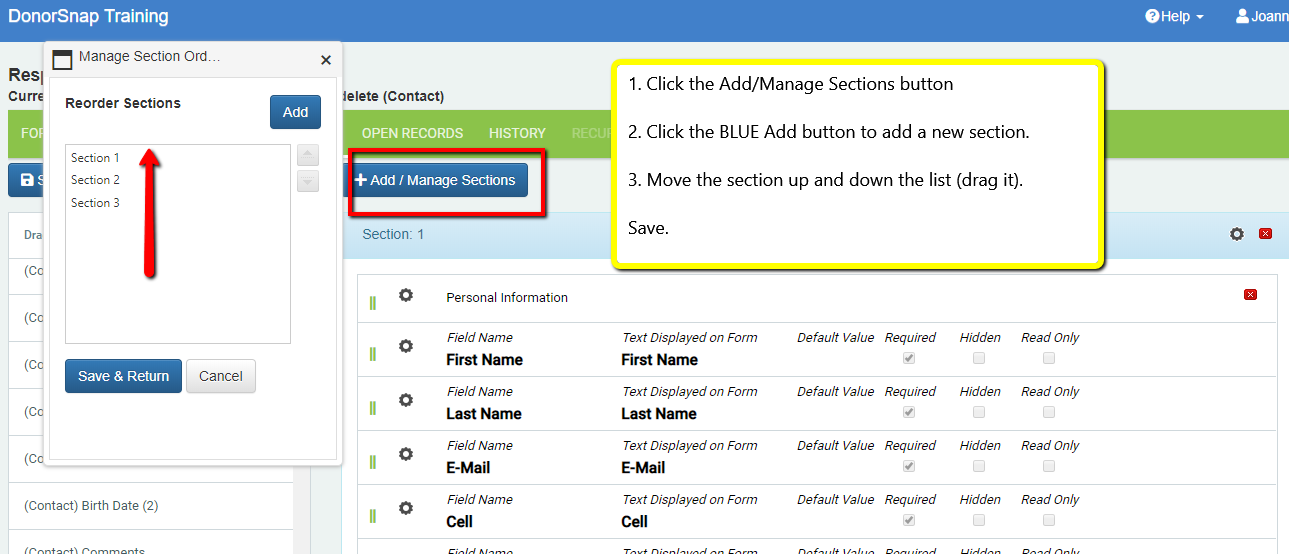
Adding Sections
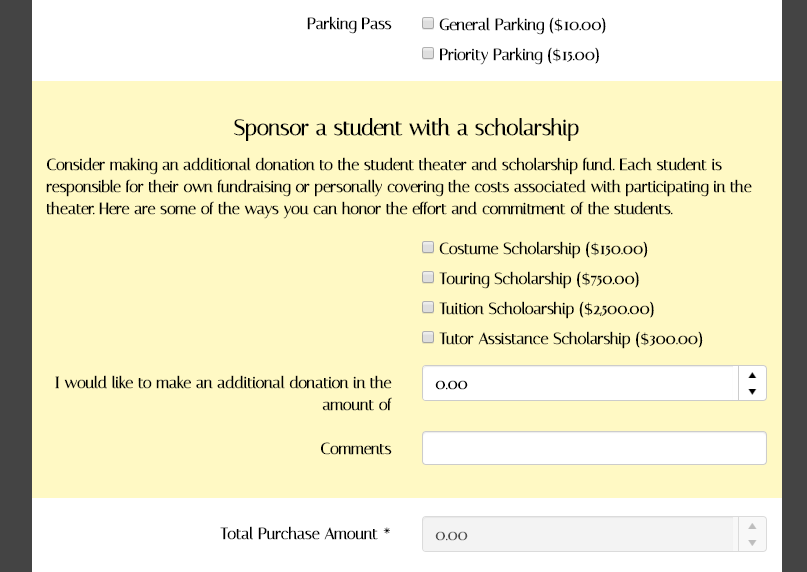
Consider this above that has different colorings in the background based on the information. What an easy way to break up your form, break important parts of the form to the forefront!
You can do this easily by adding a Text Box or Header, and changing the text color of that element’s back ground.
But check out this.
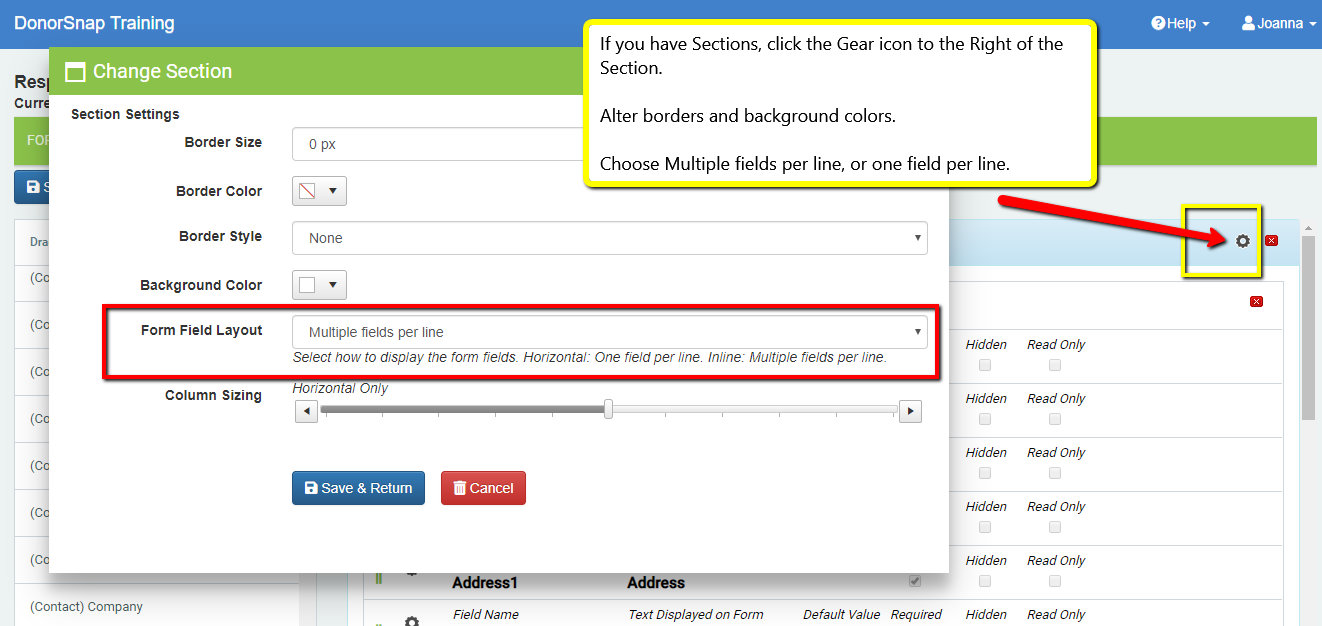
Different Sections allow you to set up fields either vertically or horizontally.
Here’s a volunteer registration form set up as normal with vertical fields:
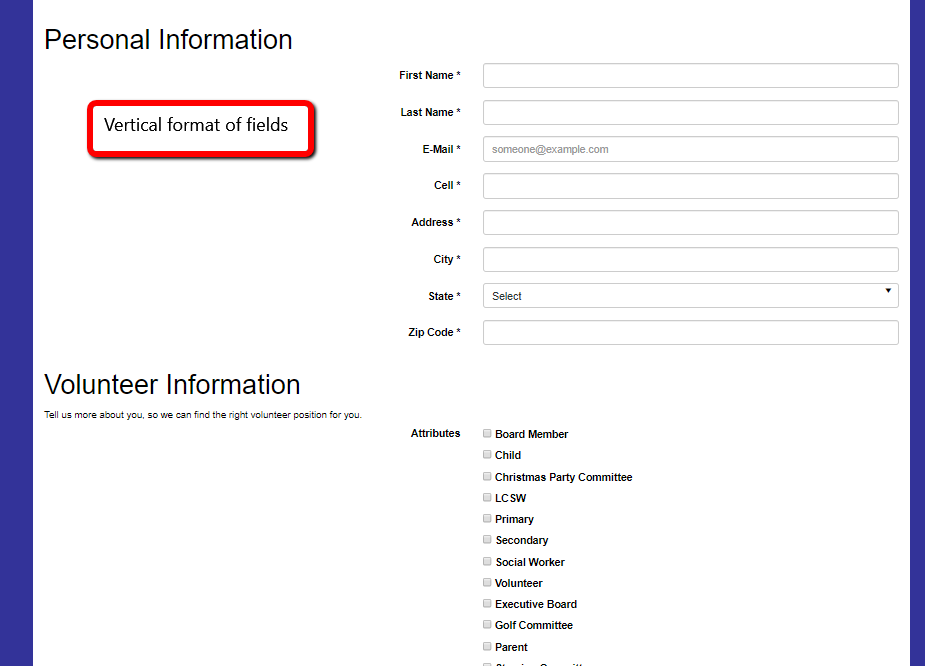
But if you separate the Personal information and the Volunteer information in to different sections, you can change the field layout for that section alone…. Volunteer information remains vertical, but Personal information turns horizontal.
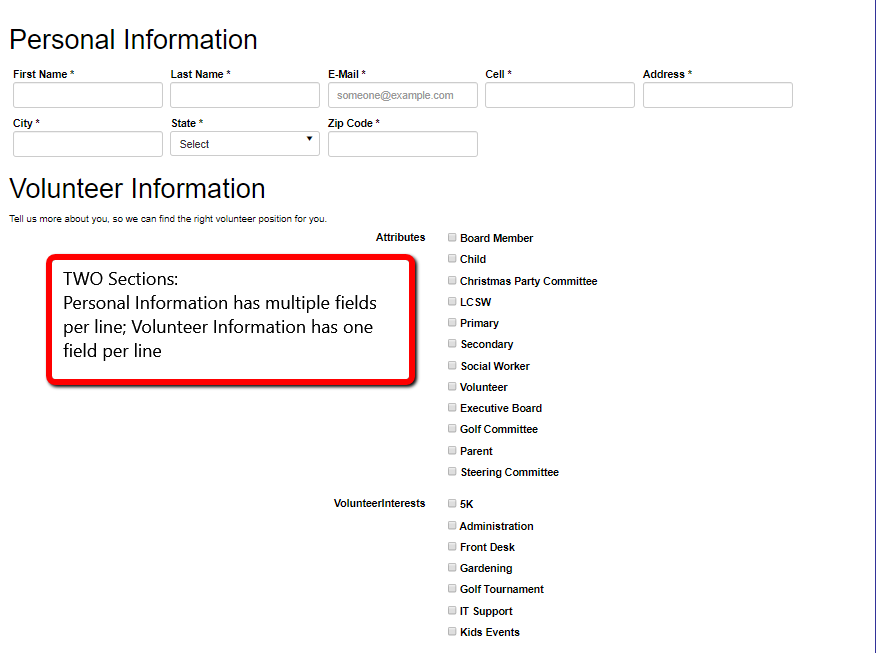
You only need to break up your Sections — each section can have different background colors and different field display options.
There’s so many options when it comes to Form Building. Your imagination is the only limitation!
Just remember, fields Have to be in the database first before you can add them on to a form (because forms fill out the database… we’ll say this over and over again). Good luck and get your creative on!
Testing a Payment Form
Since the sandbox accounts do not respond in the same way that live accounts do, DonorSnap is not able to connect to them and submit tests with test credit cards. Instead what you can do is go to the Form Builder tab and click the gear icon on the left of the Amount field. Check the box to Allow Zero Dollar Amount and save it. You can now submit the form without a payment. Make sure to switch that setting back when you are ready to go live if you want to require a payment.
Next Steps:
- Forms Listing
- Settings
- Form Builder – You are here
- Open Records
- History
- Recurring Listing
- Recurring Donation