
Using Email Templates
The Mass Email Campaigns tool includes several templates that can help get you started.
GivingTuesday Templates in DonorSnap
DonorSnap has built GivingTuesday email templates that can be customized to align with your nonprofit’s GivingTuesday campaign message.
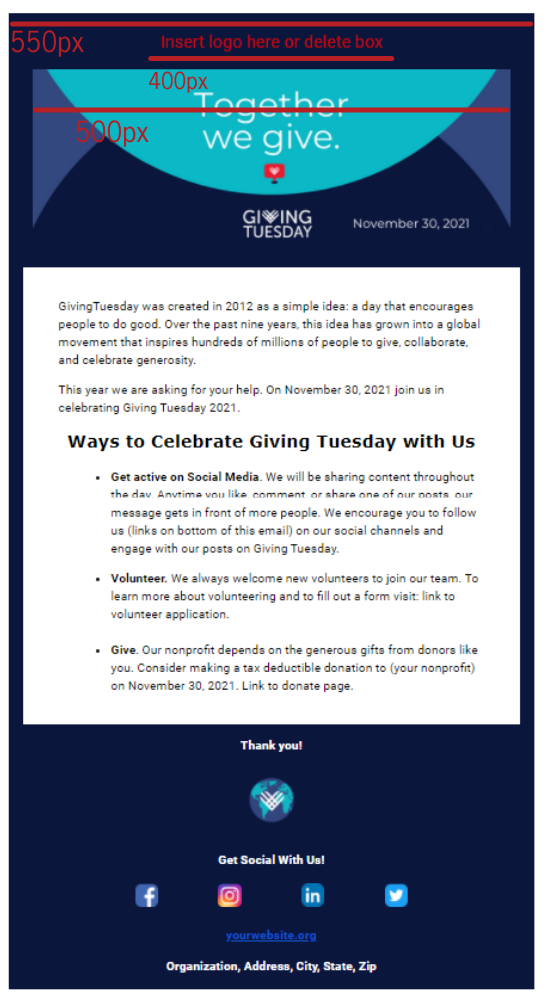
Table Sizing and Source Images
Our email templates are built with tables using HTML. It is important to size all of our source images to the exact Pixel width of the tables. Even if you adjust the size in DonorSnap, certain email service providers (such as outlook) may have issues displaying the HTML email properly.
Below find the following dimensions of the email template so you can size your source images accordingly:
Email Template Total Width: 550px
Your Logo: 400px
GivingTuesday Header Image: 500px
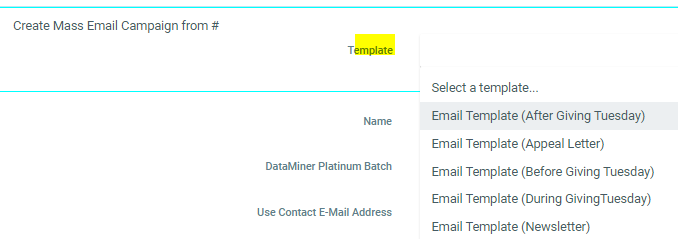
Accessing the Email Templates/Setting Up Campaigns
There are three GivingTuesday email templates living in DonorSnap’s mass email tool.
- Go to Processing > Mass Email Campaign
- Click +Add New Mass Email Campaign
- From the Template dropdown, choose which template you want to use:
- Name your campaign
- Choose your DataMiner Platinum Batch (you should have already built this mailing list). More information on building DataMiner Platinum Lists here
- Click Insert
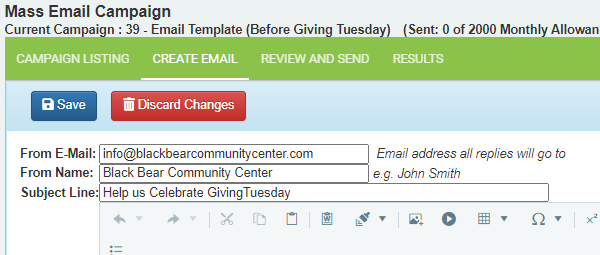
- With your new campaign highlighted click on the Create Email tab.
Editing the Email Templates
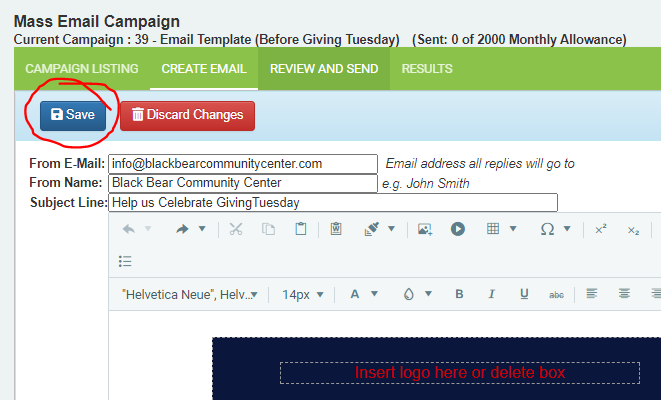
- Enter the From E-Mail, From Name and Subject Line of Your Email Campaign
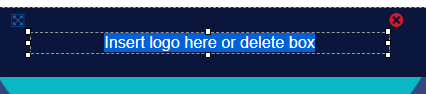
- To insert your logo delete the text that says “Insert logo here or delete box” and with your cursor still in the table click on the Insert Image icon in your top menu
- Paste the image URL to your logo in the Image URL field
- Set the width to 400 and leave Height blank
- IMPORTANT: Make Sure Your Source Image is not larger than 400px
This could cause issues with the template in email programs such as Outlook.
(it is okay if it is smaller) - To see how big your logo is, Right Click and choose “inspect”. This will give you the HTML where you will be able to identify the size of the image
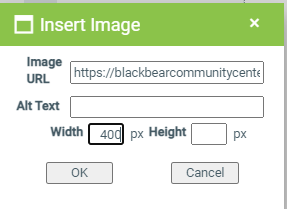
- Click OK and your logo should display at the top of the email.
- If you don’t want to display your logo, you can delete this box.
Click on the table that says “Insert logo here or delete box”. You will see a small box with arrows in an X on the top left. Click that. Once you click the small box you will see a small red x in the top left corner of the table. Click on that to delete the table.
- Edit the body text of the email to align with your campaign message
- If you want to link the social icons at the bottom of the screen to your accounts, highlight them one at a time and then click on the hyperlink manager icon in your top menu.
- Paste in the URL to your social channels and click OK.
- IMPORTANT: Make sure you click save in the top left of the create email tab, if you leave this tab you may lose your work.
Test, Test, Test!
- Once your email is ready to go, make sure you test your email on a few different devices
- To send a test, click on the Review and Send tab (Make sure you clicked SAVE first!)
- Click the Preview Email button.
- Enter the email address you want to send a test to in the “Send Test Message To:” Field
- Click the send test email button.
It is important to test out your email because it will not always look the same in someone’s inbox as it does in your preview. Most emails should display fine, but Outlook tends to have display issues. If you follow all of these steps closely your emails should display properly.